
We all know how important lighting can be in a home, heck! It’s the only reason you see things past 8:00pm…
All kidding aside, lighting can truly transform the design of any room (for good or for bad). Ever walk into a room and get creeped out just from the sight of a flickering blue fluorescent bulb? It can be a deal breaker for any design and takes all the focus away from the relaxing rocking chair or beautiful throw rug.
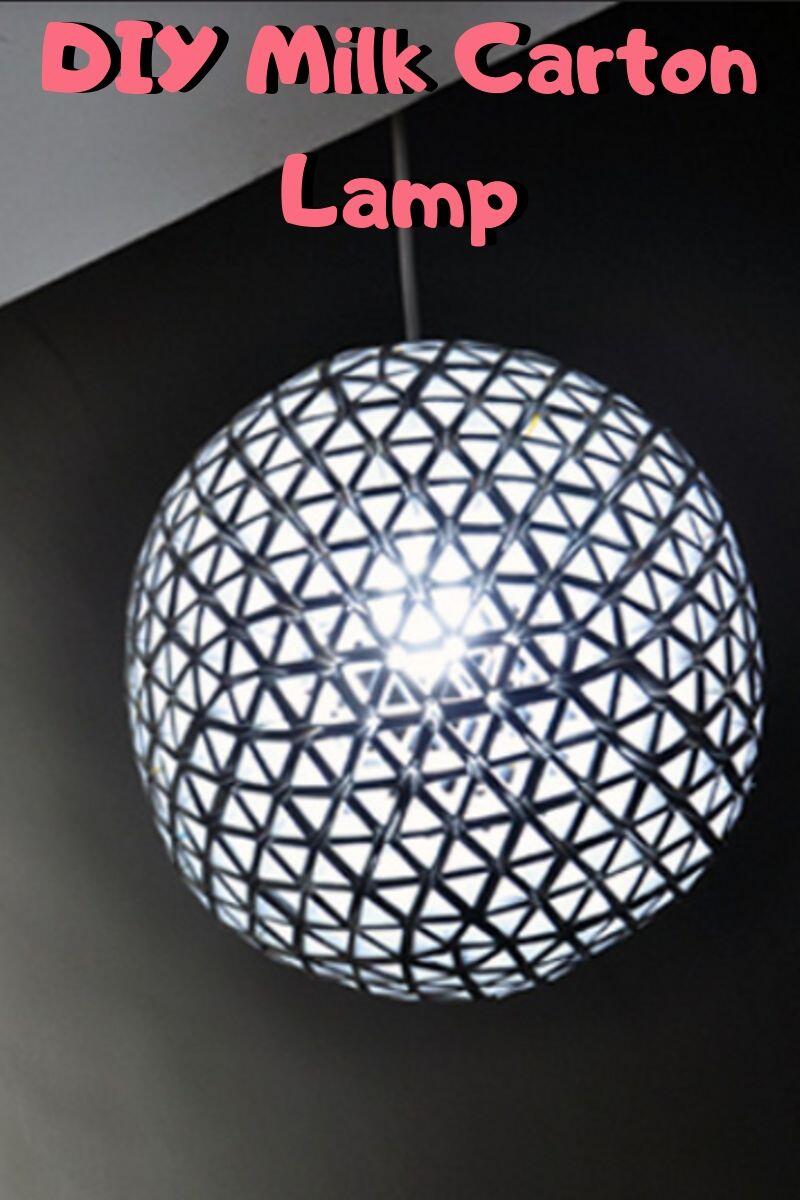
In this post I am to break the common misconception of needing to invest a lot of money to get a beautiful chandelier for your home. No need to break the bank here, we’re going to make a lamp completely from milk cartons (almond milk to be specific)
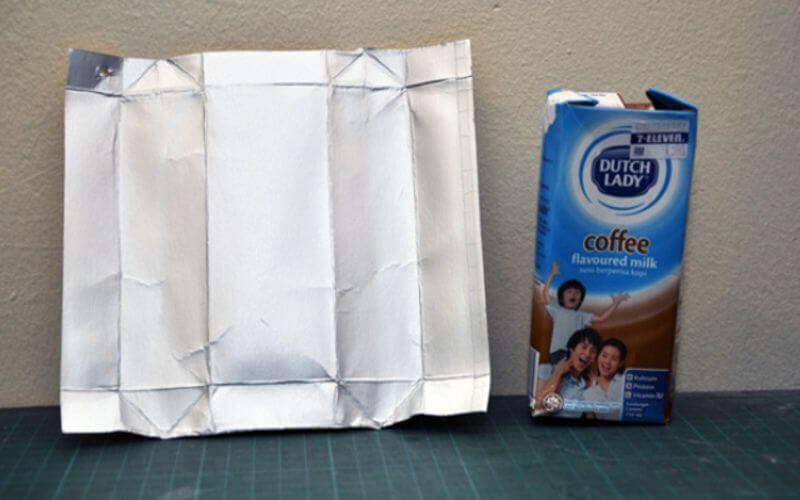
Now, i’m not prejudice as to what milk you drink or use I just found that the tetra cartons used for almond, cashew and other nut milks come in the perfect size and structure. You could certainly opt-out for juice carton or something similar if you prefer. In my experience the nut milk cartons work best. :)
Here is what you will need to get started on your DIY Milk Carton Lamp :
- 15 – 25 milk, nut or juice tetra cartons ( The number is based around the size of the lamp you want)
- Spray paint of your choice ( I went with silver)
- Fishing wire or sting
- A few battery operated LED’s
- M3 or double sided tape
Let’s begin!
Make sure all your cartons are well washed, open them up to be flat pieces of material and allow to dry.
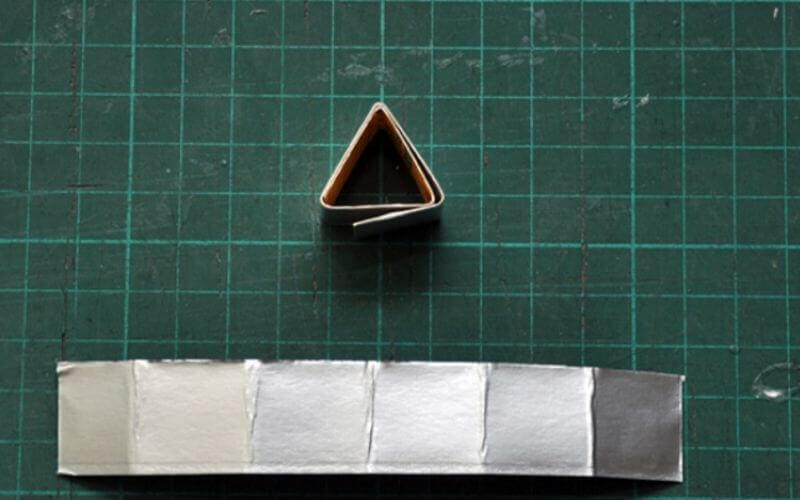
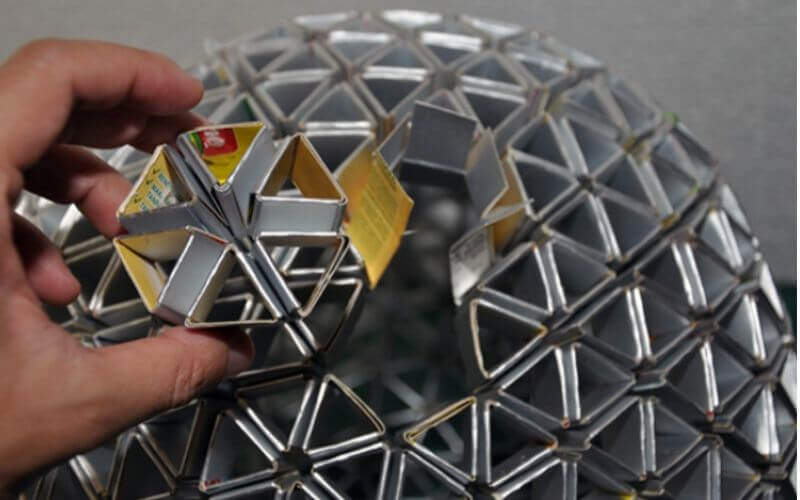
This is the tricky part so look at the images closely. There’s nothing special about the design so feel free to go rogue with your own origami type design (triangle patterns work best). So long as you build in the flap that ties the pattern together.
Cut the carton up into 2 inch strips the longest way down. Fold them into the triangle pattern shown below with a strip on one side of each sticking out.
Get to folding!
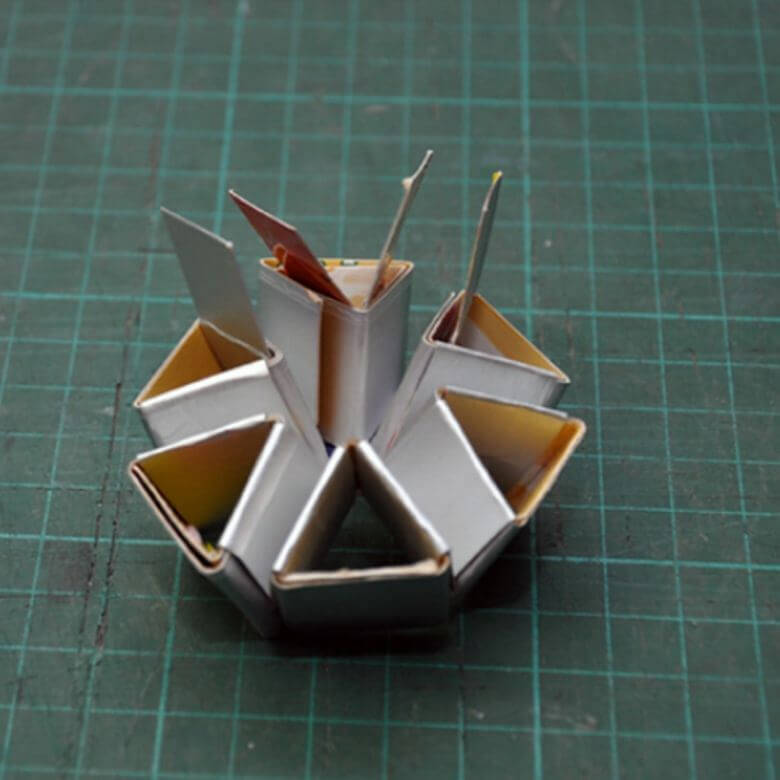
It felt like I must have folded a hundred of these things to get it to the proper size I wanted. Again, this will depend on how big you want your lamp to be. I’m sure it would look great with 30-40 of these little triangles, so long as you can close the loop that creates the ball.
Once 5 or 6 have been built you can connect the triangles to create a hexagon pattern like the ones below.
Continue to put the hexagons together that will form the ball. To start forming the ball you can leave one of the flaps open to attach them to one another or you can simply glue each section together. Using glue may be more effective in the long run.

Although the tetra packs tend to have a shiny surface there will still be some color from the outside of the pack showing. This is why I decided to spray paint the entire globe silver. I didn’t know how the paint will react with the waxy coating on the tetra so I wanted to make sure the colour blended well. (it did)
You could opt out for another colour choice here, I think black or gold would look really nice as well.
Once dry, maneuver the LED’s inside the lamp and secure with the M3 or double sided tape. Run the fishing line from the bottom of the lamp, secure again to the top of the lamp and leave enough line to attach to any point of the ceiling in your desired room.

You’re all set! Sit back in glory as you send good riddance to that flickering bulb you left behind. If you are looking for more unique lamp options that take way less time (only a click of a button) check out the Original moon lamp made using 3D printing here.
You may also want to check out one of our favorite DIY projects, check out these Easy DIY Mason Jar Lights.